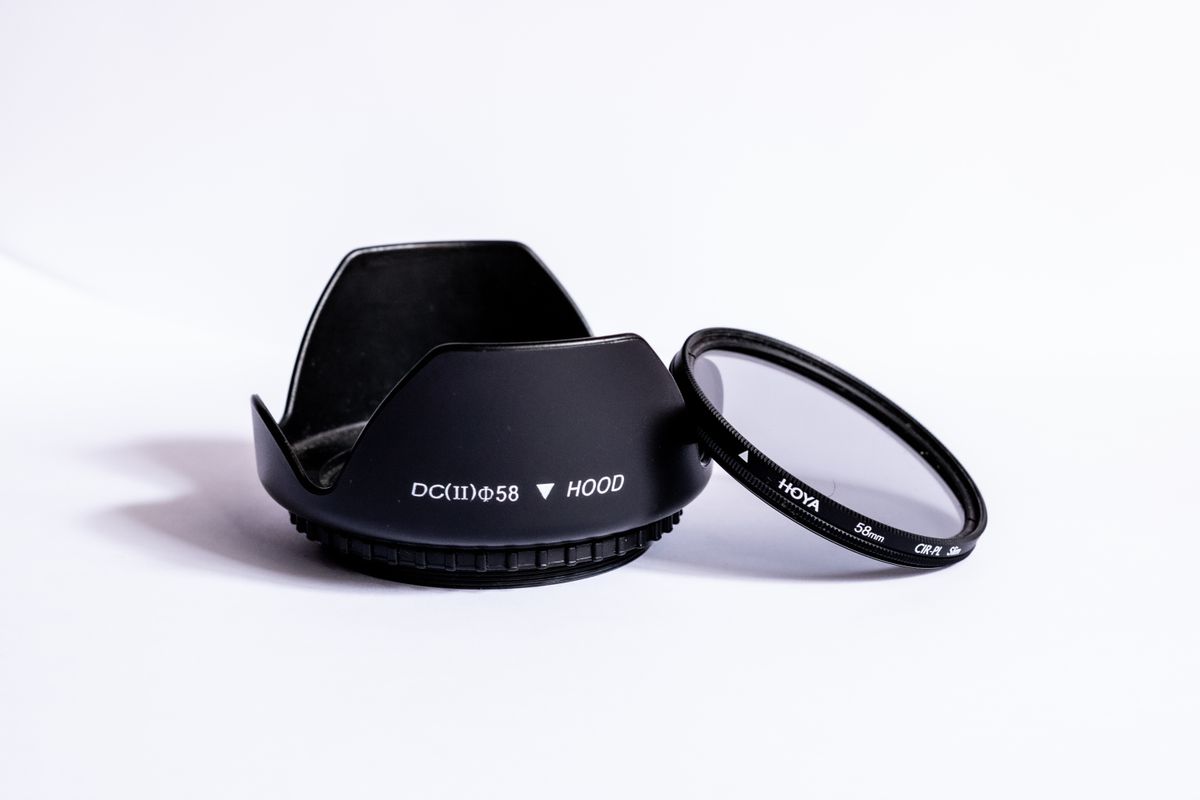
A polariser and an ND filter are not interchangeable. A polariser selectively blocks polarised light to cut glare and deepen colours. An ND filter reduces overall light intensity without changing the look of your image. Many photographers own both, but which one you reach for depends entirely on what you are trying to do.
Here is what we cover: how each filter works with a simple analogy, a head-to-head comparison across 5 key differences, when to use each one (and when to skip it), whether you can stack them, and a straightforward decision guide.
What a Polariser Does
A polariser is a selective filter. It targets light waves vibrating in a specific direction — the light that creates glare on water, reflections on glass, and that washed-out haze in bright skies.
Picture a rope shaking up-and-down trying to pass through a vertical picket fence. Only the wiggle that matches the gap gets through; the rest is blocked. A polariser does the same to light waves. It passes only light oscillating in one orientation and blocks the rest.
Rotate the front ring of the filter, and you control which orientation gets through — giving you fine-grained control over reflections and glare. The effect cannot be replicated in post-processing.
A polariser typically reduces light by about 1–2 stops, but that is a side effect, not the purpose.
For the full physics behind it, see our guide on how polarisation works.
What an ND Filter Does
An ND (neutral density) filter is a uniform dimmer. It reduces the intensity of all wavelengths of light equally — like putting on a good pair of dark sunglasses.
Picture a room with a dimmer switch. Flick it down and every light in the room dims by the same amount. No colour shifts, no selective blocking — everything just gets darker. An ND filter does exactly that to the light entering your lens.
ND filters come in different strengths measured in stops. A 3-stop ND (ND8) reduces light to 1/8. A 10-stop ND (ND1000) reduces it to 1/1000, allowing shutter speeds measured in seconds even in broad daylight.
The purpose is to give you exposure control: slower shutter speeds for motion blur, wider apertures for shallow depth-of-field, and proper exposure in scenes that would otherwise force you into a narrow aperture or high ISO.
5 Key Differences: Polariser vs ND Filter
| Aspect | Polariser | ND Filter |
|---|---|---|
| What it does | Selectively blocks polarised light | Uniformly reduces all light |
| Effect on image | Changes colours, contrast, reflections | No change — just darker |
| Can it be replicated in post? | No | Yes (by underexposing and lifting shadows) |
| Light loss | 1–2 stops | 1 to 20+ stops (fixed or variable) |
| When you reach for it | Glare, reflections, dull skies, foliage | Long exposures, wide apertures in bright light, video |
1. Effect on the image
A polariser changes what your image looks like. It removes glare, deepens blue skies, makes clouds pop, and saturates foliage. An ND filter does none of these things — it just makes the whole scene darker so you can use a slower shutter speed or wider aperture.
2. Post-processing possibility
This is the big one. The effect of a polariser is impossible to replicate in post-processing. Once glare is captured in the raw file, it is baked in. An ND filter's dimming effect is trivial to reproduce — just underexpose and lift the shadows in editing. The reason to use an ND filter in-camera is to get the in-camera effect: motion blur from a long exposure or a shallow depth-of-field in bright light that would otherwise force a narrow aperture.
3. Light reduction
A polariser cuts 1–2 stops as a side effect. ND filters range from 1-stop (ND2) to 20+ stops (ND1000000). For serious long-exposure work — waterfalls, cloud streaks, crowds disappearing — you need an ND filter of 6 stops or more.
4. What you can control
With a polariser, you rotate the front ring to dial in exactly how much reflection or glare you want to eliminate. With an ND filter, the only control is choosing the right strength (or using a variable ND that adjusts from about 2 to 8 stops).
5. Everyday usefulness
A polariser is useful in almost any outdoor scene: landscapes, cityscapes, water scenes, foliage, architecture through glass. An ND filter is situational — invaluable when you need it, but you can shoot all day without one if you are not doing long exposures or shooting wide-open in bright sun.
For a practical guide on using a polariser in photography, read our article on what a CPL filter is and how to use it.
When to Use a Polariser
Reach for a polariser when you want to:
Cut glare on water. Reflections on rivers, lakes, and the sea wash out detail. A polariser restores clarity and colour.
Darken a blue sky. Rotate until the sky deepens and clouds stand out. The effect is strongest at 90° from the sun. Use the L-shape rule: thumb at the sun, index finger points in the direction of maximum effect.
Remove reflections from glass. Shooting through a window or shooting glass buildings? A polariser eliminates the mirror-like reflections.
Saturate foliage. Leaves and wet vegetation reflect a surprising amount of polarised light. A polariser makes greens richer and more natural.
Skip the polariser in low light, at night, for sunrise or sunset when you want warm reflections, or when shooting panoramas (the sky can develop uneven dark patches).
When to Use an ND Filter
Reach for an ND filter when you want to:
Blur motion in water. A 3–6 stop ND lets you shoot waterfalls and streams at 1–2 second exposures for that silky look.
Blur motion in clouds or crowds. A 6–10 stop ND turns moving clouds into streaks and crowds into ghostly blurs.
Shoot wide open in bright sun. A 2–3 stop ND lets you use f/1.4 or f/1.8 portraits on a sunny day without overexposing.
Shoot video at the 180° rule. A variable ND filter is essential for outdoor video to maintain proper shutter speed at wide apertures.
Skip the ND filter in low light, for handheld shots where you already have enough shutter speed, or when you want maximum image sharpness (adding glass in front of the lens slightly degrades resolution).
Common Misconception: A Polariser Is Just a Dark Filter
Some photographers treat a polariser as a kind of ND filter — something that makes the image darker but somehow "better." That is not how it works.
A polariser blocks specific orientations of light waves. It is the orientation-selectivity that removes glare, deepens skies, and saturates colours. The 1–2 stop light loss is incidental. If you just want a darker image, use an ND filter or close your aperture.
If you treat a polariser as a permanent lens cap, you will end up with over-darkened skies, uneven polarization on wide-angle shots, and missed shots in low light. Use a polariser deliberately for the effect only you can deliver in-camera.
Can You Stack Them?
Yes, you can screw an ND filter on top of a polariser. The typical stack on a landscape photographer's lens: polariser first (for glare and sky), then a 3–6 stop ND (for water or cloud motion).
The combined light loss can be 4–7 stops, which makes autofocus difficult in anything but bright sun. Use a tripod, focus before attaching the ND, and use live view with manual focus.
Better alternative: buy a polariser with high transmission (some lose only 1 stop) and a separate variable ND. Or use a magnetic filter system that lets you swap quickly.
Decision Guide: ND Filter or Polariser?
| You are shooting... | Pick this |
|---|---|
| A lake with glare on the surface | Polariser |
| A waterfall that needs a 2-second exposure | ND filter |
| A city through a glass window | Polariser |
| A portrait at f/1.4 on a sunny beach | ND filter |
| Foliage after rain | Polariser |
| Cloud streaks across the sky | ND filter |
| Architecture with reflective glass | Polariser |
| A panorama with uneven sky risk | Neither (polariser can cause banding) |
| Outdoor video with proper shutter speed | Variable ND |
| Wildlife in bright midday sun | ND filter (to use wide aperture) |
For a curated list of polarisers we recommend, see our best polarising filters guide.
External resources
- PetaPixel: CPL Filter — Why, When, and How to Use a Circular Polarizer — practical photography guide with before-and-after examples showing polariser effects
- Wikipedia: Polarizing Filter (Photography) — technical reference covering polariser construction and optical principles
- Kase Filters: Using CPL Filters Guide — manufacturer guide with usage tips and photography type recommendations
Frequently Asked Questions
What is the difference between a polarizer and an ND filter?
A polariser selectively blocks polarised light to reduce glare and enhance colours. An ND (neutral density) filter uniformly reduces light across the spectrum without changing colour or contrast. A polariser changes the look of your image; an ND filter just lets you use slower shutter speeds or wider apertures in bright light.
Can I use a polarizer and ND filter together?
Yes, you can stack a polariser and an ND filter. Screw the polariser onto the lens first, then the ND filter on top. The combined light loss can be 3–5 stops, so you may struggle to autofocus in low light. Avoid stacking two ND filters — use a single variable ND or a strong fixed ND instead.
Should I get a polarizer or ND filter first?
Get a polariser first. A polariser produces effects — glare reduction, deeper skies, saturated colours — that cannot be replicated in post-processing. An ND filter is valuable for long exposures and shallow depth-of-field in bright light, but those effects are less essential for everyday shooting.
Does a polarizer work like an ND filter?
No, but a polariser does reduce light by about 1–2 stops, which gives it a mild ND-like side effect. However, the primary purpose is to control reflections and enhance colour. An ND filter exists purely to reduce light uniformly without changing the look of the image.
Can I use a polarizer for long exposure photography?
You can, but it is not the best tool. A polariser reduces light by only 1–2 stops — not enough for the multi-second exposures needed for silky waterfalls or cloud motion. Use a 6-stop or 10-stop ND filter for long exposures and add a polariser only if you also need glare control.
What is the difference between CPL and ND filters?
A CPL (circular polariser) selectively blocks polarised light to reduce reflections and saturate colours. An ND filter reduces light intensity uniformly without affecting colour. In practice: a CPL changes what your image looks like; an ND changes how it is exposed.
Do I need both a polarizer and ND filter?
If you shoot landscapes, water scenes, or architecture regularly, yes. The polariser handles reflections and colour; the ND filter handles exposure control. Together they cover the two biggest challenges in outdoor photography — glare and excessive brightness.

About Umar Farooq
Umar Farooq writes in-depth guides on the physics of light and optics — from reflection, refraction, and lenses to diffraction, lasers, and fiber optics, explained from first principles.
Read more about Umar Farooq →