
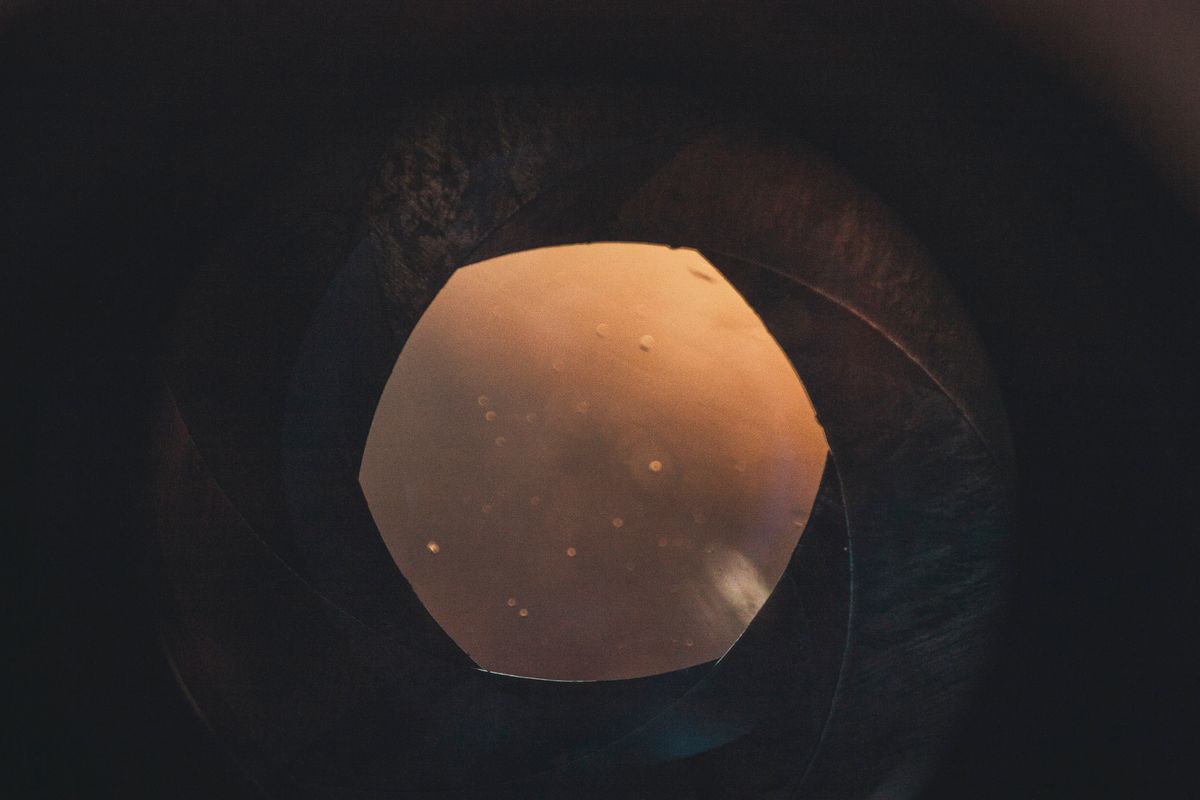
Diffraction spikes are inevitable in photography — they are a physical consequence of light passing through an opening. Squint your eyes at a street lamp. The rays you see coming off it are created by light bending around your eyelashes and eyelids. The same thing happens inside your camera. The aperture blades form a polygonal opening, and every edge in that opening diffracts light, sending it in directions it would not otherwise travel.
Some photographers chase the starburst effect for artistic reasons — the rays on city lights or the sun cresting a ridge. Others fight them, especially in astrophotography, where spikes from telescope struts can obscure faint details. Either way, understanding why they form and how aperture size affects them gives you control over the final image.
What are diffraction spikes and why do they appear?
A spike is a ray of light radiating from a bright point source in an image. It is not a lens flare (which comes from internal reflections in the lens), and it is not sensor blooming (which is an electronic artefact). It is a pure diffraction effect.
Here is the mechanism. When light passes through an opening, every point along the edge of that opening acts as a new source of waves (Huygens's principle). These edge waves spread out and interfere with the main beam. For a straight edge — like an aperture blade — the interference creates a line of constructive interference perpendicular to that edge. If your aperture is a hexagon (six blades), each of the six edges produces its own line, and those lines radiate outward from the bright source.
The number of spikes you see depends on whether your aperture blade count is even or odd:
- Even number of blades: the spikes from opposite edges overlap, so you see the same number of spikes as blades (e.g. 6 blades → 6 spikes).
- Odd number of blades: the spikes from opposite edges do not align, so you see twice the number of spikes as blades (e.g. 7 blades → 14 spikes).
This is why some lenses produce 6-pointed stars and others produce 14 or 18. The aperture blade count is printed in the lens specifications for many modern lenses.
How aperture size affects diffraction spikes and sharpness
The smaller the aperture, the more pronounced the effect. At wide apertures (f/1.4, f/2), most of the light passes through the centre of the opening, far from the edges. The edge contribution is tiny, and spikes are barely visible. Stop down to f/11, f/16, or f/22, and a much larger fraction of the total light passes close to the aperture edges, so the diffraction pattern becomes strong.
This is the same knife-edge diffraction that happens when a wave meets a sharp obstacle. Think of it like a sea wave hitting the edge of a harbour wall — the wave bends around the corner and spreads into the sheltered area. Your aperture blade is the harbour wall, and the light is the wave. At small apertures, a greater proportion of the wavefront interacts with the "wall," so more light bends.
The trade-off: small apertures give you greater depth of field (more of the scene in focus) but stronger diffraction. Large apertures give you shallow depth of field but weaker diffraction. There is no free lunch.
A useful rule of thumb: on a full-frame camera, you can usually shoot up to f/11 before diffraction becomes noticeable at normal viewing sizes. At f/16 it is visible when you pixel-peep. At f/22 it softens the whole image. On a smartphone with its tiny sensor, the diffraction limit kicks in around f/2.8 because the pixels are so small.
The Airy disc: why small apertures soften your photos
Diffraction does not only create decorative spikes. It also imposes a fundamental limit on how sharp your images can be. Even with a theoretically perfect lens, a point of light never appears as a perfect point on the sensor. It spreads into a pattern called the Airy disc — a central bright spot surrounded by concentric rings of decreasing intensity.
The diameter of the Airy disc is:
d = 2.44 × λ × N
where λ is the wavelength of light (about 550 nm for green light) and N is the f-number. At f/8, the Airy disc is about 10.7 µm across. At f/16 it doubles to about 21.5 µm. At f/22 it reaches about 29.5 µm.
When the Airy disc is smaller than a single pixel on your sensor, diffraction does not limit your resolution — the pixel size is the bottleneck. But once the Airy disc grows larger than a pixel, each point of light spreads across multiple pixels. Fine detail blurs together. This is the diffraction-limited regime.
For a full-frame camera with 24 megapixels (pixel pitch roughly 5.9 µm), the Airy disc exceeds the pixel size around f/8 to f/11. Beyond that, stopping down further reduces sharpness even as it increases depth of field. A 50-megapixel camera has smaller pixels (around 4.1 µm), so the diffraction limit starts earlier — around f/5.6 to f/8. But here is the subtlety: at f/11, the 50 MP camera still records more total detail than the 24 MP camera, because the larger Airy disc is still being sampled by more pixels. More megapixels never hurt. They just reveal diffraction sooner.
Sweet spot apertures: balancing sharpness and diffraction
A lens is sharpest not at its widest aperture and not at its smallest. The sharpest aperture — the sweet spot — is where two competing effects balance:
- Lens aberrations (spherical aberration, coma, astigmatism) are strongest at wide apertures. Stopping down reduces them because the aperture blocks the most problematic edge rays.
- Diffraction increases as the aperture shrinks, because more light interacts with the blade edges.
The sweet spot is the f-stop where these two curves cross. For most lenses on full-frame cameras, it falls between f/5.6 and f/8. For APS-C cameras, slightly wider: f/4 to f/5.6. Premium lenses with excellent aberration correction may peak as wide as f/4. Budget lenses may peak at f/8 or even f/11.
If you need maximum sharpness and depth of field is not critical, shoot at the sweet spot. If you need depth of field, stop down to f/11 or f/16 and accept the mild sharpness loss — the trade-off is usually worthwhile for landscape and macro photography.
How to find your lens's sweet spot
Set your camera on a tripod, point it at a detailed flat target (a brick wall or a test chart), and take a series of shots at every aperture from wide open to f/22. Use a remote shutter release or a 2-second delay to avoid shake. Keep the same composition, lighting, and focus point. Then compare the images at 100% magnification on a computer. The aperture that gives the sharpest result in the centre and the corners is your lens's sweet spot. Do this once for each lens you own. The results will surprise you — some lenses peak wide open, others need to stop down two or three clicks.
Diffraction spikes in astrophotography
Telescopes produce these spike patterns too, but for a different reason. In reflecting telescopes (Newtonian, Schmidt-Cassegrain, Ritchey-Chrétien), the secondary mirror is held in place by thin struts called a spider. Light from a star diffracts around these struts, producing characteristic cross-shaped spikes.
The classic Celestron C8 Schmidt-Cassegrain telescope, for example, has a four-vane spider that produces four spikes forming a cross. The length and brightness of the spikes depend on the strut width, the telescope aperture, and the brightness of the star. Thinner struts produce fainter but longer spikes.
Some telescope designs avoid spikes entirely. Refractors (lenses instead of mirrors) have no central obstruction and no support struts, so they produce spike-free images. Off-axis reflector designs like the Herschelian or Schiefspiegler also eliminate spikes, though they come with other optical compromises.
In post-processing, astrophotographers use software like Siril, PixInsight, or Photoshop to remove diffraction spikes from final images. Siril, in particular, has a dedicated "Remove Diffraction Spikes" tool that works well for the four-spike pattern common in Newtonian and SCT telescopes.
How to add or remove diffraction spikes
Creating spikes on purpose
If you want a starburst effect in your daytime or night photography, the simplest method is to stop down to a small aperture — f/11, f/16, or f/22 — and include a bright point source in the frame. The sun through tree branches, street lamps at dusk, or reflections off water all produce strong results. The effect is strongest with shorter focal lengths because the physical aperture diameter is smaller for the same f-number on a shorter lens. A 24 mm lens at f/22 produces more dramatic spikes than a 200 mm lens at f/22, even though both are set to the same f-stop.
For even more control, photographers use star filters (also called cross filters or diffraction filters). These are glass filters with a fine grid etched into the surface that creates additional spike patterns regardless of aperture. The downside: they can introduce flare and reduce overall contrast.
Removing spikes in post
In astrophotography, spikes from telescope struts are usually unwanted because they obscure faint detail. Software tools can remove them:
- Siril: the "Remove Diffraction Spikes" tool detects and replaces spike regions using interpolation.
- PixInsight: the "DynamicBackgroundExtraction" or dedicated spike removal scripts.
- Photoshop: manual cloning with the spot healing brush works well for small spikes.
The effectiveness depends on how bright the spikes are relative to the background. Very bright spikes from bright stars may leave residual artefacts. For the cleanest results, capture multiple exposures and stack them — the spike pattern changes angle slightly with telescope orientation and can be rejected during stacking.
If you shoot with a refractor telescope, you will not have spikes at all, because there are no support struts in front of the objective lens. This is one reason refractors are popular for wide-field astrophotography where preserving faint detail around bright stars matters.
Common misconception: diffraction spikes are lens flaws
A spike is not a sign of a bad lens. It is a sign of a small aperture. The best lenses in the world produce these patterns when stopped down — it is physics, not optics. A lens that produces beautiful 14-pointed stars at f/16 is not defective. It is revealing the shape of its aperture.
For more on the physics behind diffraction, see what is diffraction and examples of diffraction in everyday life. The relation between aperture size and the diffraction pattern is also covered in our guide on single slit diffraction.
External resources
- Cambridge in Colour: Diffraction Limited Photography — detailed tutorial with Airy disc calculations and interactive tools
- Wikipedia: Diffraction Spike — thorough technical explanation of spike formation in telescopes and cameras
- SLR Lounge: Diffraction, Aperture, and Starburst Effects — practical guide for creating starburst effects in-camera
Frequently Asked Questions
What is a diffraction spike in photography?
A diffraction spike is a line of light radiating from a bright point source in a photograph, caused by light diffracting around the edges of aperture blades or telescope support struts. The spikes form a star-shaped pattern, often called the starburst effect or sunstars. The number of spikes depends on the aperture blade count: lenses with an even number of blades produce the same number of spikes, while odd-numbered blades produce twice the number.
How do you prevent diffraction in photography?
You cannot eliminate diffraction entirely — it is a fundamental property of waves. But you can minimise its visible effect by avoiding very small apertures (f/16, f/22, f/32) unless you specifically need the depth of field. For maximum sharpness, shoot at your lens's sweet spot aperture, typically f/5.6 to f/8 on full-frame cameras and f/4 to f/5.6 on APS-C. Using a wider aperture lets in more light and reduces the Airy disc size relative to your pixels.
Why do stars have diffraction spikes in photos?
Stars appear as diffraction spikes in telescope images because light from the star diffracts around the support struts (spider vanes) that hold the secondary mirror in reflecting telescopes. The struts create a cross-shaped diffraction pattern — the Fourier transform of the strut geometry. In refracting telescopes (which use lenses instead of mirrors), there are no support struts, so no diffraction spikes appear.
What is the Airy disc in photography?
The Airy disc is the central bright spot of the diffraction pattern formed when light passes through a circular aperture. Even with a perfect lens, a point of light is never imaged as a perfect point — it spreads into a disc surrounded by faint rings. The diameter of the Airy disc is given by d = 2.44 × λ × f-number, where λ is the wavelength of light and f-number is the aperture setting. When the Airy disc exceeds the pixel size on your sensor, the image becomes diffraction-limited and sharpness decreases.
What is the sweet spot aperture for a lens?
The sweet spot is the f-stop where the lens delivers maximum sharpness, achieved by balancing two competing effects: lens aberrations (which decrease as you stop down) and diffraction (which increases as you stop down). For most full-frame lenses, the sweet spot is between f/5.6 and f/8. For APS-C cameras, it is typically f/4 to f/5.6. The exact value depends on the lens design and sensor resolution.
What is knife-edge diffraction in optics?
Knife-edge diffraction describes how waves bend around a sharp edge — such as the edge of an aperture blade, a building, or a mountain. When a wave passes a sharp obstacle, it does not stop abruptly at the edge. Instead, it bends into the shadow region, creating a diffraction pattern. In photography, knife-edge diffraction at the aperture blades is the physical mechanism that creates both starburst patterns and the softening of images at small apertures.

About Umar Farooq
Umar Farooq writes in-depth guides on the physics of light and optics — from reflection, refraction, and lenses to diffraction, lasers, and fiber optics, explained from first principles.
Read more about Umar Farooq →